
Mastering Bat Shaving: Step-by-Step Guide to Maximizing Bat Performance
Introduction:
Bat shaving has become one of the most talked-about performance enhancement techniques in softball and baseball. (Learn the difference between [bat rolling vs. shaving]) Whether you’re working with a brand-new composite bat or an older favorite, shaving the barrel can dramatically improve distance, pop, and overall hitting power. In this detailed guide, we break down the bat shaving process step by step—from end cap removal to compression testing—so you understand exactly how a shaved bat is made.
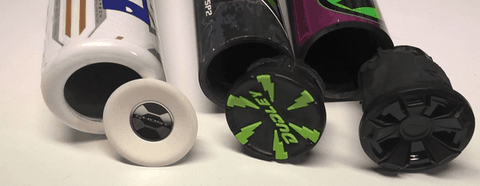
Step 1: End Cap Removal
The first step in shaving a bat is carefully removing the end cap. This component is critical to the bat’s structure and must be handled with precision to avoid cracks or damage. With the right tools and expertise, the cap is removed cleanly and later reattached securely, preserving the bat’s original look and fit.
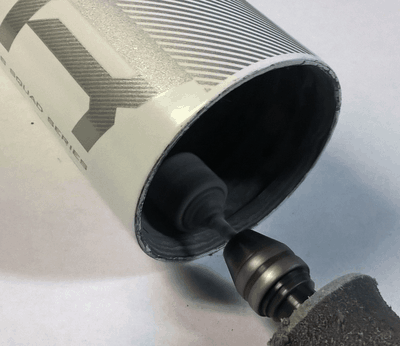
Step 2: Preparing the Bat
Once the cap is removed, the barrel is prepped for shaving. Any excess material near the cap area is cleared, and the bat’s exterior is protected with a barrier to keep the paint and finish safe during the process
Step 3: CNC Lathe Shaving
The real magic happens inside the bat shaving machine (CNC lathe) (See our [softball bat shaving service]) for details. Here, the inner walls of the barrel are carefully shaved down to predetermined specs for each specific model (bat buying guide). Using precise X and Z coordinates, the lathe ensures consistent results that maximize performance while keeping the bat structurally sound.
Step 4: Weight Adjustment
After shaving, the bat is cleaned and weighed. Since shaving removes material, weight adjustments are made to restore balance. Depending on the player’s preference, weight can be redistributed toward the handle for better control, or end-loaded for more power at contact.
Step 5: Polymer Coating
To reduce composite flaking and extend the life of the shaved bat, a polymer coating is applied inside the barrel. This helps maintain durability while still allowing for explosive performance gains. Most modern bats do not need polymer, it is becoming outdated because barrel are cracking from the outside in and in the past they started to crack from the inside out.
Step 6: Reassembly & Bonding
The bat is reassembled with a heavy-duty epoxy to secure the end cap. A 36-inch clamp holds everything in place overnight, ensuring a strong and gap-free bond that will hold up under repeated use.
Step 7: Quality Inspection & Compression Testing
Before any shaved bat is approved, it undergoes strict quality control and compression testing. This ensures that the modifications deliver peak performance while maintaining consistency and safety.
Conclusion:
Bat shaving is both an art and a science. When done correctly, it can unlock massive gains in distance and pop, giving players an edge at the plate. This step-by-step bat shaving guide demonstrates the precision, expertise, and care required to produce high-performance shaved softball and baseball bats. Shaved bats can unlock massive gains in distance and pop. To understand how these compare with legal game bats, check out this guide to baseball bat rules.
1 Comment
How can I go about removing end caps from softball bats without a rolling machine and just a heat gun?